In this step by step guide, we will show you how to install PrayBox+ Plugin.
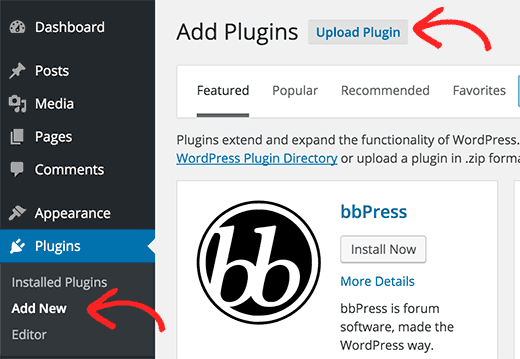
First, you need to have the plugin file (which will be a zip file). Next, you need to go to WordPress admin area and visit Plugins » Add New.
After that, click on the Upload Plugin button on top of the page.
This will bring you to the plugin upload page. Here you need to click on the choose file button and select the plugin file you downloaded earlier to your computer.
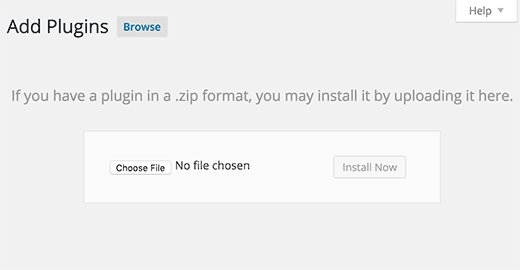
After you have selected the file, you need to click on the install now button.
WordPress will now upload the plugin file from your computer and install it for you. You will see a success message like this after installation is finished.
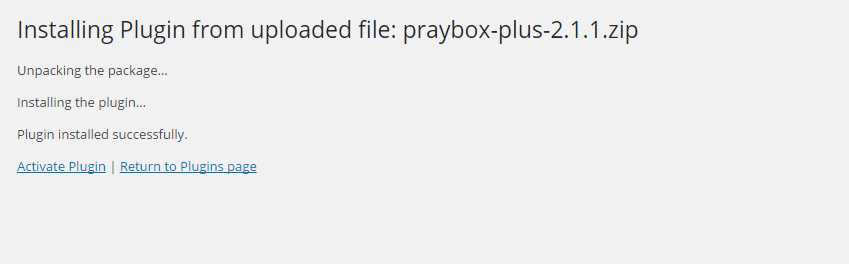
Once installed, you need to click on the Activate Plugin link to start using the plugin.
There is one step many people seem to overlook when upgrading to the premium version of a plugin – uninstalling the free version!