PrayBox plugin uses mail function in PHP to send emails. This mail function often does not work as expected due to a number of reasons. The most common reason is because your hosting company may have strict email configuration or they have disabled it entirely to avoid abuse. In either case, your notifications or emails generated by PrayBox will not be delivered.
Let’s take a look at an example: Assume that your admin email address in WordPress is yourusername@gmail.com and your site’s domain name is yoursite.com. Emails sent by WordPress will be sent from an email address like WordPress@yoursite.com. This is not an actual email address. Many spam filters will mark it as spam and sometimes the email will not even leave your web host before its been discarded as abuse.
That’s why we recommend using Postman SMTP plugin to send emails in WordPress. SMTP (Simple Mail Transfer Protocol) is the industry standard for sending emails. Setting up email can be a little bit difficult for new WordPress users. However, keep in mind that you will only have to do this once.
Let’s take a look at how to setup Postman SMTP services to send out WordPress emails.
First thing you need to do is install and activate Postman SMTP Mailer/ Email Log plugin. Upon activation, you need to visit Settings » Postman SMTP page to configure the plugin settings.
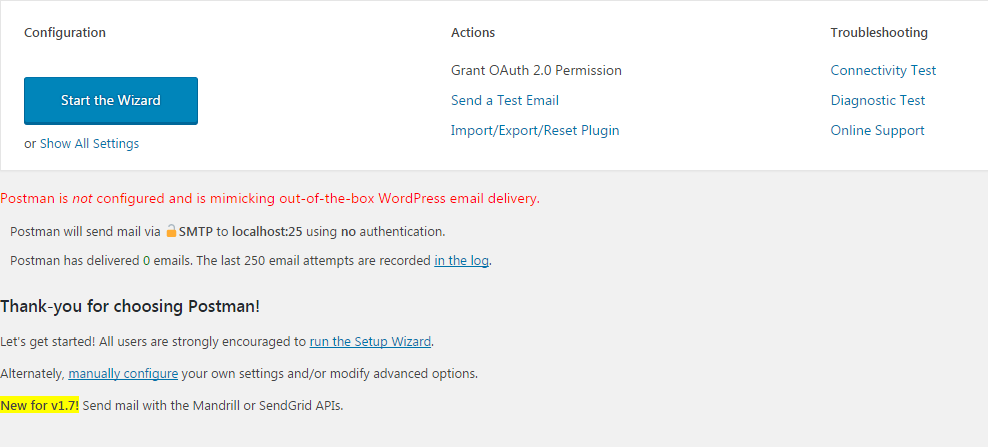
Simply click on Start the Wizard button to get started. You will be asked if you would like to import settings from another plugin. Click on next button to continue.
Next you need to enter your Gmail email address and sender name. Click on the next button to proceed.
The plugin will now try to figure out your SMTP server. In this case, it will show smtp.gmail.com, click on the next button to continue.
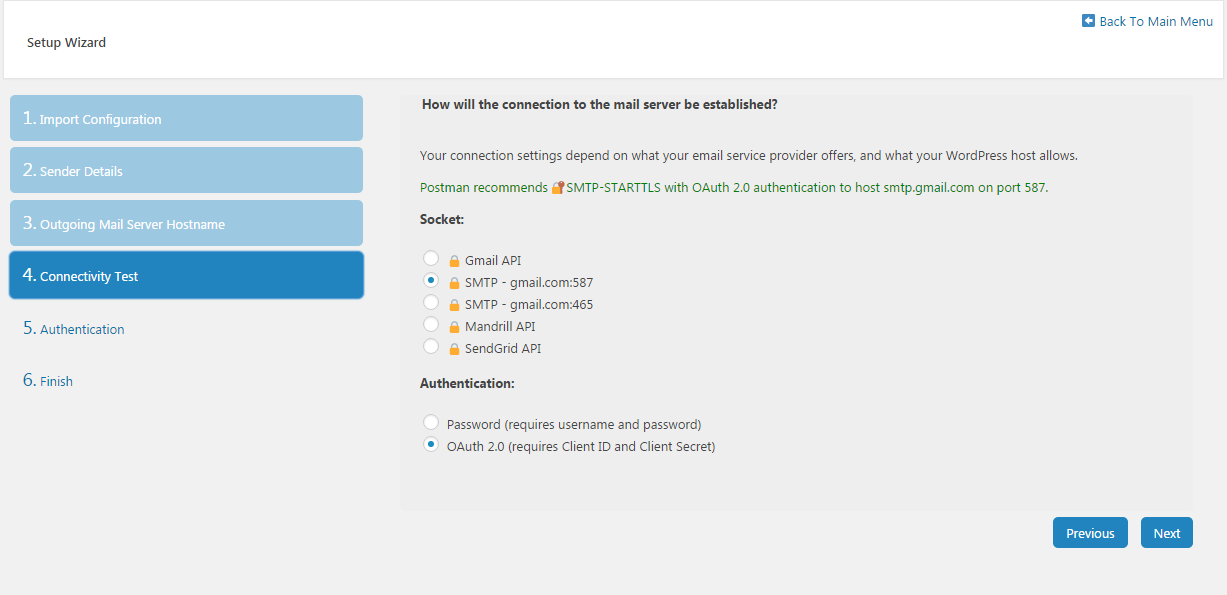
The plugin will now run some tests and will show you the best possible settings. For Gmail SMTP, the recommended settings are SMTP-STARTTLS with OAuth 2.0 authentication.
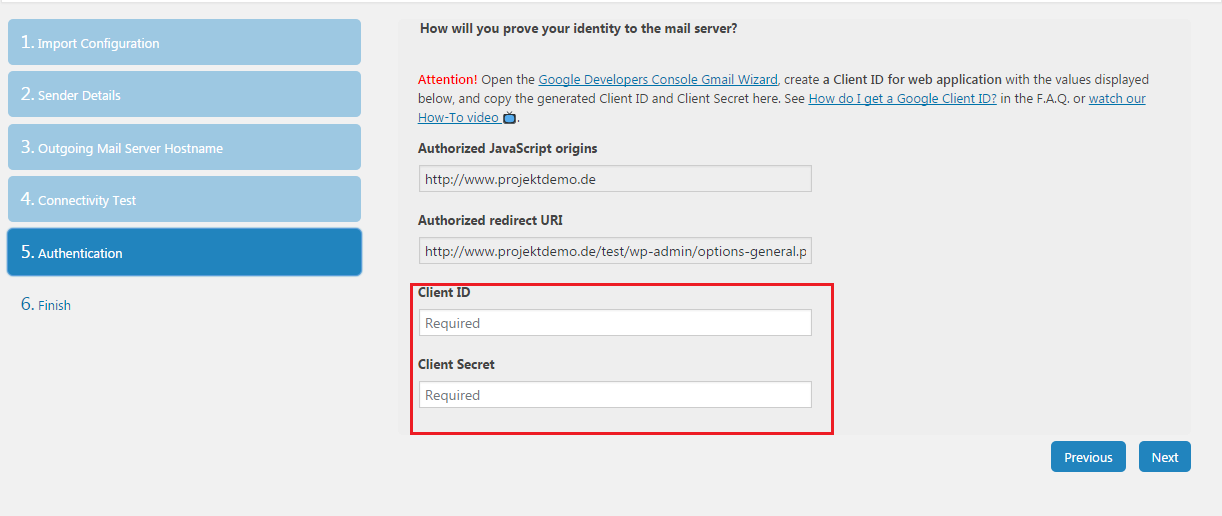
Click on the next button to continue and the plugin will show you two URLs and will ask you to provide Client ID and Client Secret.
You will also find the link to Google Developers Console Gmail Wizard, which will take you to a step by step wizard for generating those API keys.
Once you open the wizard, you will be asked to login with your Google account. Use your Gmail address (the same email address that you are configuring Postman with) as the Google account to proceed.
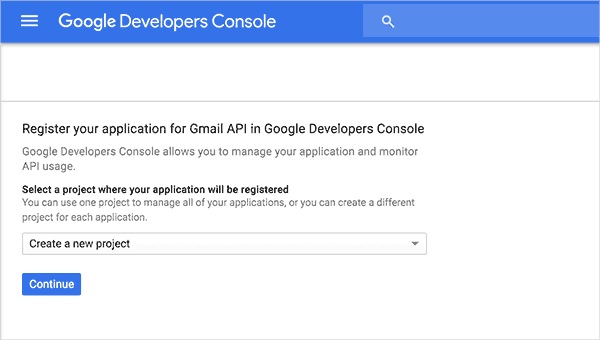
Next, you will be asked to create a new project. Simply click on the continue button.
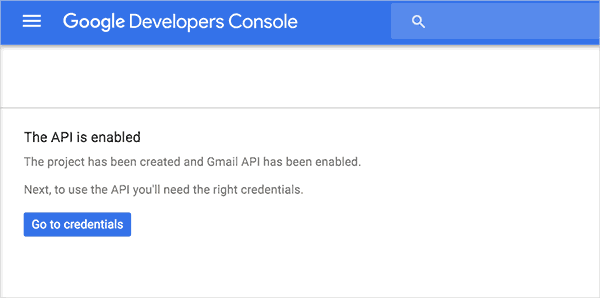
Google Developer Console will now create a project for you with the Gmail API. You will see a message that a project has been created with the Gmail API enabled.
Click on the ‘Go To Credentials’ button to continue.
On the next screen, you will be asked where will you be calling the API from? You need to select Web Browser (Javascript). Under ‘What data will you be accessing?’, select User Data.
Click on ‘What credentials do I need?’ button to continue.
You will now reach the ‘Create an OAuth 2.0 client ID’ step of the wizard. Provide a name, this could be your website title or anything you want.
After that copy the ‘Authorized JavaScript origins’ URL and ‘Authorized redirect URI’ shown on the Postman wizard screen and paste theme here.

Click on the ‘Create Client ID’ button to proceed.
You will be now asked to setup OAuth screen. Simply select your gmail address and provide a name for the App that is accessing your Gmail Account. In this case, it will be your own website.

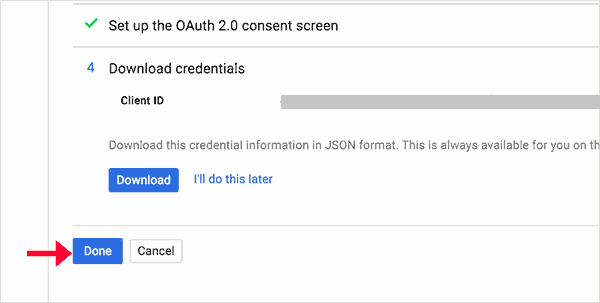
After that click on the continue button. Your Gmail API is now all set with OAuth authentication enabled for it. You need to click on the Done button.
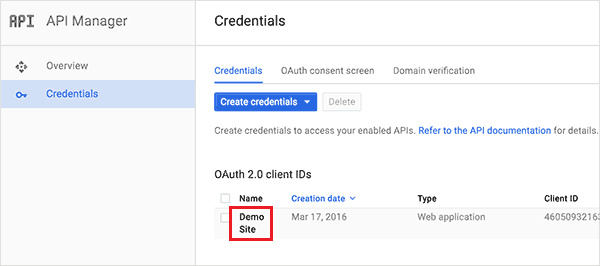
This will take you to your API credentials list. On this page page, you will see the client IDs that you have created to access your Gmail API. Click on the Name of your website or project client. You will get to see your client ID and client secret keys.
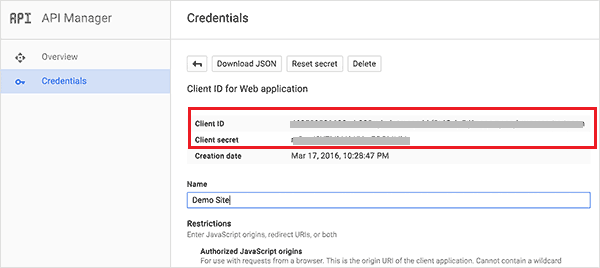
You need to copy those keys and paste them in the Postman plugin page on your WordPress site.
After that click on the next button to continue. You have successfully finished the Postman plugin’s setup wizard. Click on the finish button to exit the wizard.
Now, you need to grant your WordPress site permission to access your Gmail account. Simply click on the ‘Grant permission with Google’ link on the Postman plugin page in your WordPress site.
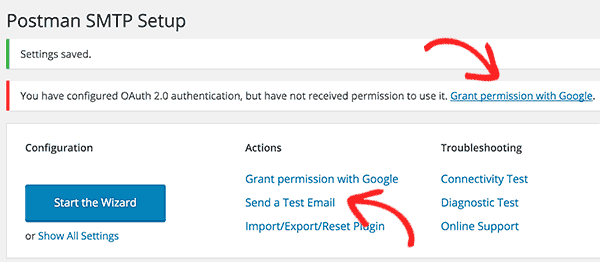
This will take you to your Google account. You need to click on the Allow button to give your website access to your Gmail account. You can now send yourself a test email to see if everything is working fine.
We hope this article helped you learn how to use Postman SMTP to send WordPress emails.